
GitHub Integration
Connect, configure, and manage the Ossprey GitHub App for automated repository scanning.
Ossprey integrates with GitHub via a GitHub App to automatically scan your repositories for malicious packages. This section covers how to connect, configure, and manage the integration.
Why connect GitHub?
Connecting your GitHub account enables automatic scanning on pull requests, continuous monitoring without manual intervention, easy setup with no CLI installation or configuration files required, and organisation-wide coverage — install once and scan across all your repos without requiring individual developers to change their workflows.
Connecting GitHub
Step 1: Navigate to GitHub Integrations
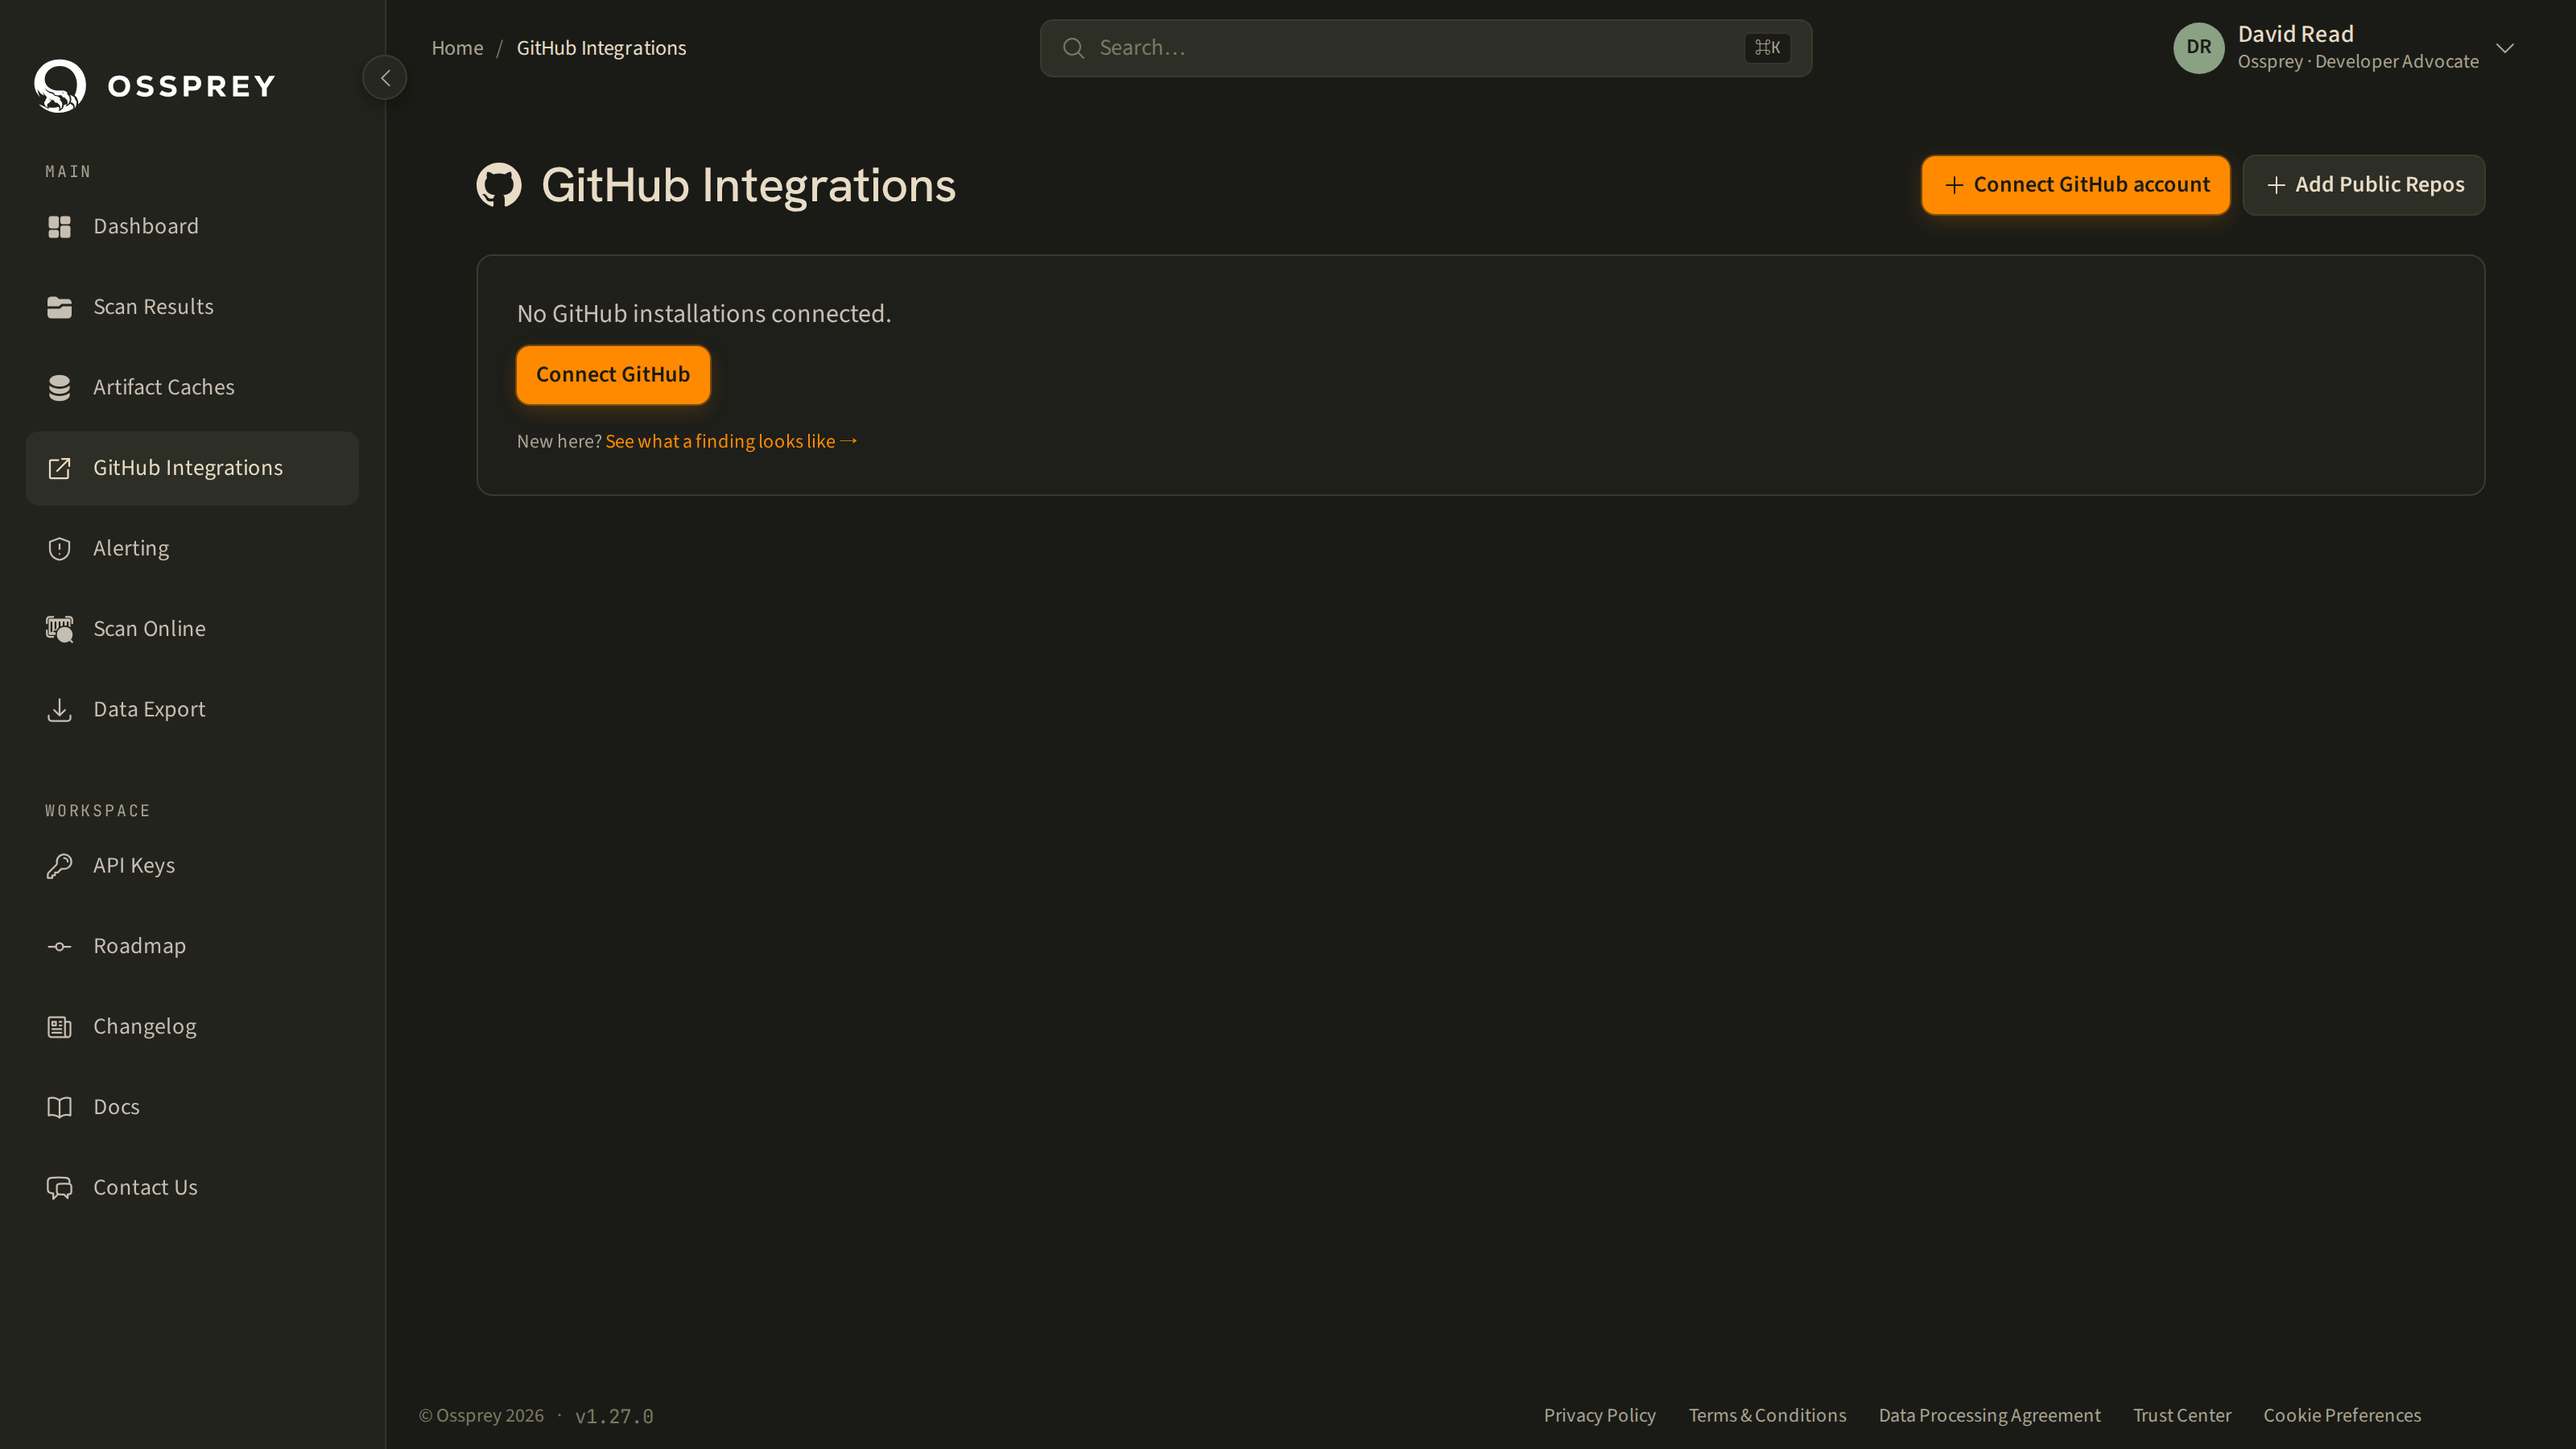
Click GitHub Integrations in the sidebar menu.
Step 2: Install the Ossprey GitHub App
- Click Connect GitHub
- You'll be redirected to GitHub
- Select the organisation or personal account you want to connect
- Choose repository access — All repositories (current and future) or Selected repositories (choose specific repos to monitor)
- Click Install to complete the setup
The Ossprey GitHub App requests read access to your repository metadata and contents. It reads your repository to generate SBOMs — and, for public repositories where you've enabled code scanning, to analyse the code itself — but does not store your source code.
Step 3: Verify the connection
After installation, you'll be redirected back to Ossprey. Your connected account will appear on the GitHub Integrations page showing the account/organisation name, number of accessible repositories, and connection status.
Step 4: Test with a single repository
Before enabling all your repositories, we recommend starting with one repo. Open Monitoring for the installation from the GitHub Integrations page, enable scanning for a single repository, and confirm a scan completes successfully. Once you're satisfied, expand to additional repositories.
Where to find MonitoringGitHub Monitoring isn't a top-level sidebar item — you reach it from the GitHub Integrations page (per installation), or from the button on an empty Scan Results page. The breadcrumb reads GitHub Integrations → Monitoring.
Managing repositories
Viewing installations
The GitHub Integrations page shows all connected accounts with their repository count, monitoring status, and connection health.
Adding more accounts
Click Connect GitHub again to add additional organisations or accounts.
Modifying access
To change which repositories Ossprey can access:
- Go to your GitHub account settings
- Navigate to Applications → Installed GitHub Apps
- Find Ossprey and click Configure
- Update repository access as needed
Configuring repository monitoring
Open Monitoring from the GitHub Integrations page to configure how your repositories are scanned. For each repository you can set:
- Branch — which branch to monitor (defaults to the repository's default branch). You can monitor the same repository on more than one branch; scan results carry the branch, and the Scan Results table has an inline branch dropdown for switching between them.
- Path — a subdirectory to scan, for monorepos where the manifests you care about aren't at the root. Scan history is scoped to the path, so two monitors on different paths in the same repo don't overwrite each other.
- What to scan — dependencies, the repository's own code, or both. Both are on by default.
- Pull requests — whether to scan PRs raised against the monitored branch.
- Schedule — automatic scans nightly, weekly, or off. Nightly is the default.
Settings are editable in place — you no longer need to delete and re-add a repository to change how it's scanned.
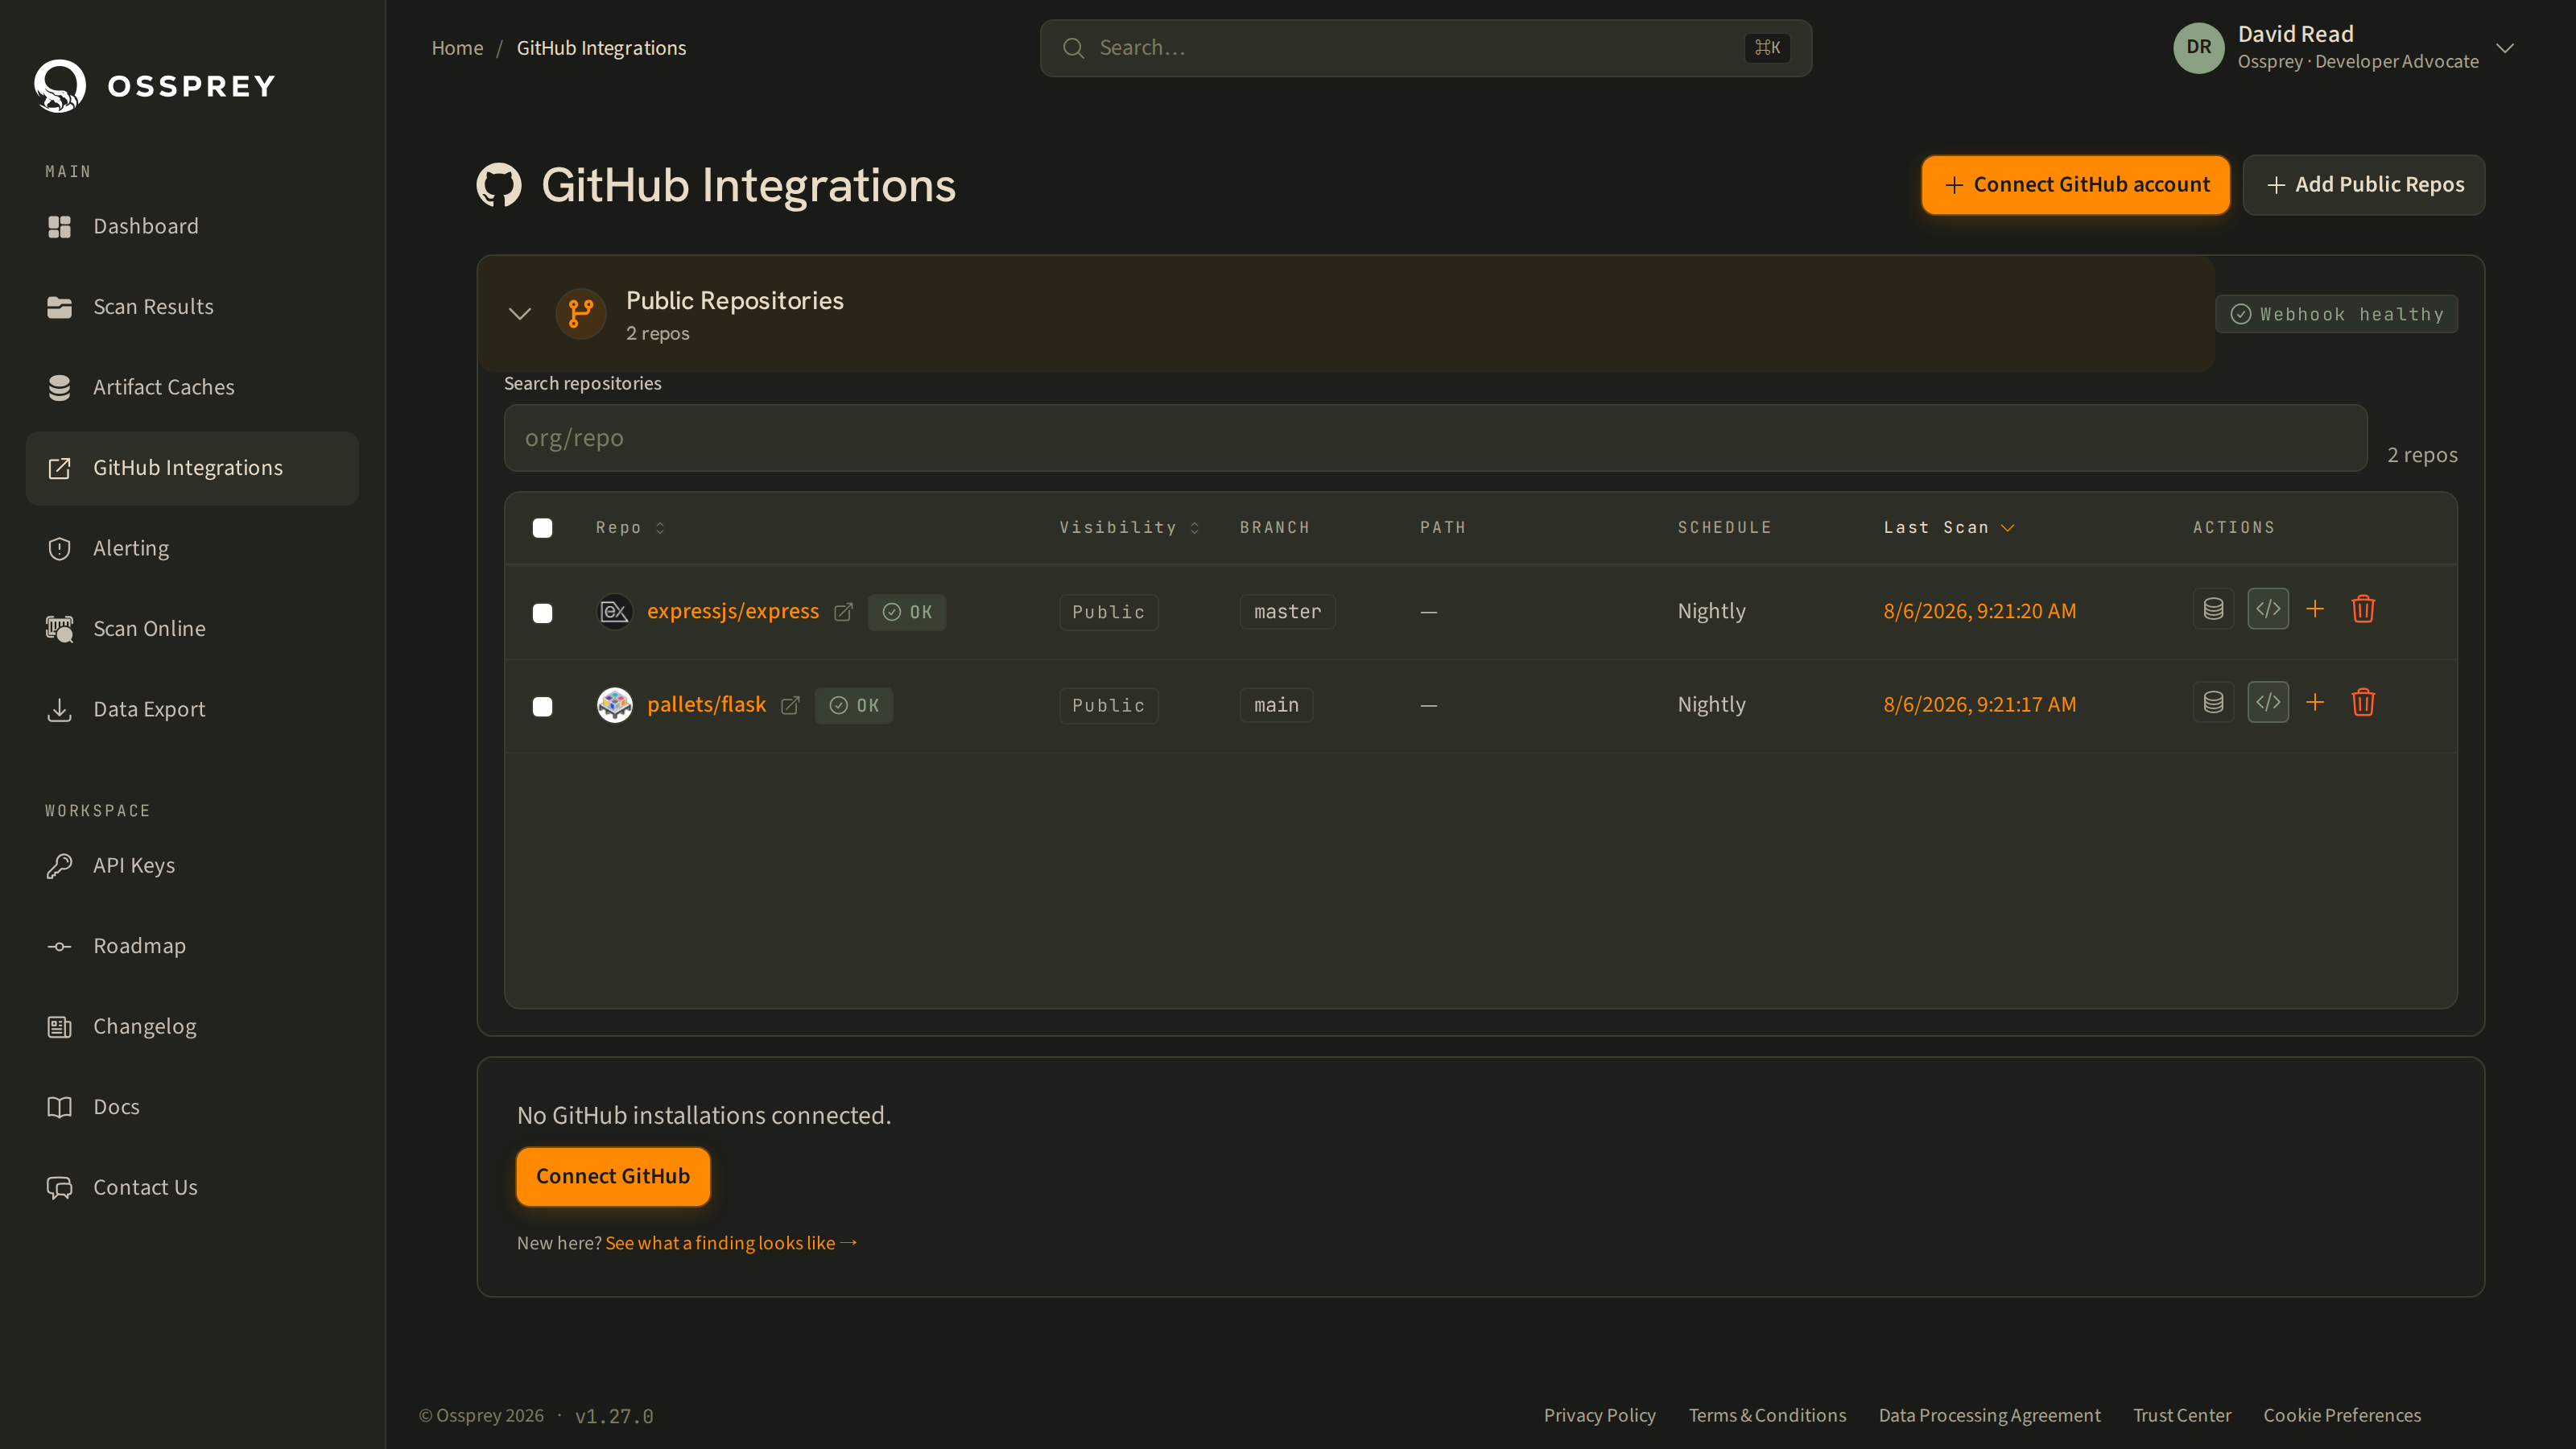
Code scanning is public repositories onlyScanning a repository's own source code (as opposed to its declared dependencies) is currently available for public repositories only. Private repositories are scanned for dependencies.
Branch list limitWhen choosing which branch to monitor, Ossprey lists up to 10,000 branches per repository. If a repository has more branches than that, the list is truncated and some branches may not appear in the selector — contact support if the branch you need isn't shown.
Adding repositories in bulk
For anything more than a handful of repos, use the bulk import instead of adding them one at a time. Paste a list of repositories or upload a .txt/.csv file, choose the scan options to apply, and Ossprey queues them all for monitoring. Each repository reports its own progress, so a single failure (a typo, a repo the app can't see) doesn't hide the ones that worked. Optional per-repository paths are supported.
Ossprey detects duplicate monitors, so re-importing a list that overlaps with what you already monitor won't create doubles. Organisations past 100 repositories get clearer cues about what's included.
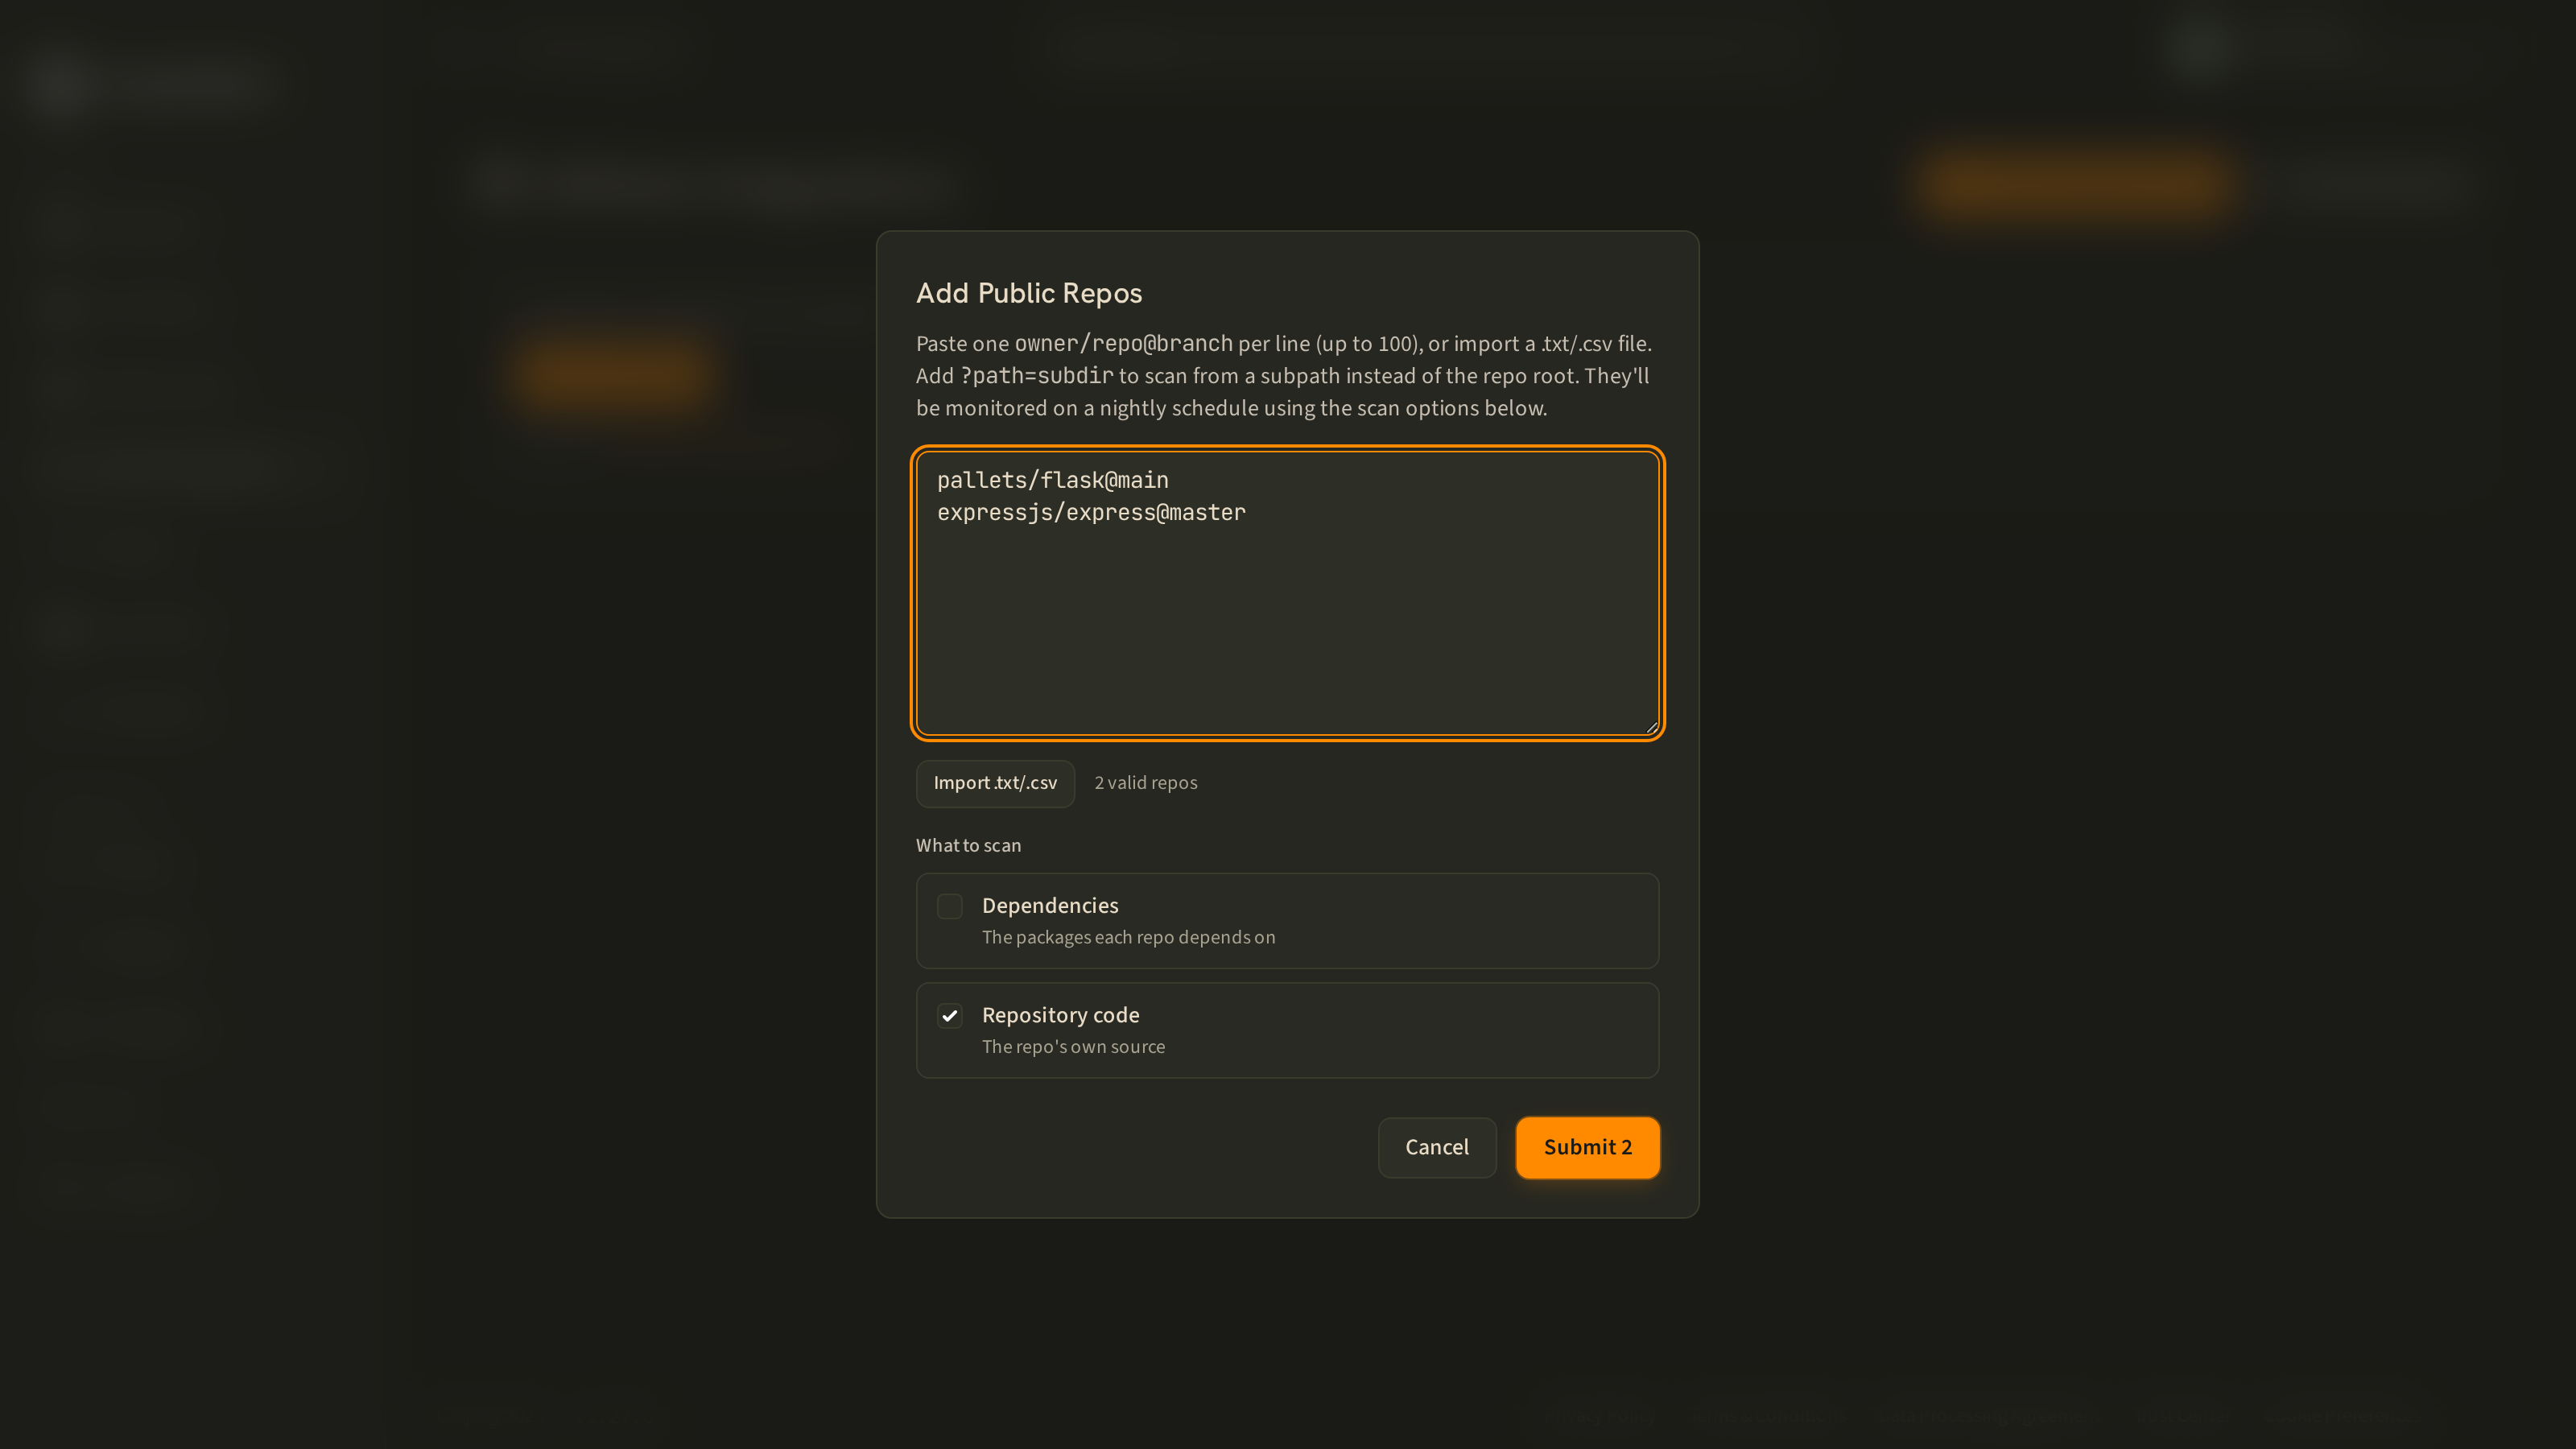
Adding public repositories
You can also monitor public repositories that you don't own. On the Monitoring page, click Add Public Repository, enter the owner/organisation and repository name, configure monitoring settings, and save. Public repositories are accessed via GitHub's public API and don't require app installation.
Paste a linkThe scan and monitoring forms understand pasted GitHub URLs — drop in a full
https://github.com/owner/repolink and Ossprey parses out the owner and repository for you.
How scans work
Your repositories are scanned in the following scenarios:
- On pull request — when a PR is opened or updated against the monitored branch (if PR scanning is enabled for that repository)
- On schedule — nightly or weekly, based on your configured scan schedule
- Manually — when you request a new scan from the dashboard
Ossprey analyses your package manifest files (e.g. package.json, requirements.txt, poetry.lock) to build an SBOM of your dependency tree, then scans each package for known malware. Where code scanning is enabled, the repository's own source is analysed too. Scan results appear on the Scan Results page, organised by organisation/repository.
Every GitHub scan is pinned to the exact commit it ran against, so a result is reproducible: you can always tell which revision of the repository produced a given verdict.
Getting told about findingsTo have malware findings reach your inbox, Slack channel, or incident.io workspace, set up an alert rule — see Notifications & Alerts. Ossprey will also notify you if a package one of your repositories already depends on is later identified as malicious.
Troubleshooting the integration
Repository not appearing
- Verify Ossprey has access to the repository in GitHub Settings → Applications → Installed GitHub Apps
- Check that the repository isn't empty
- Ensure the repository has a supported package manifest (package.json, requirements.txt, etc.)
Scans not running
- Confirm the repository is enabled in GitHub Monitoring
- Check that you're opening PRs against the monitored branch
- Verify your account is in good standing
Connection issues
- Try disconnecting and reconnecting the GitHub app
- Check GitHub's status page for any ongoing issues
- Check that your organisation allows third-party apps
- Contact support if problems persist
Updated 2 months ago